Enhance views
Contents
Enhance views#
In Getting started, we saw how to develop our views by writing html code directly in CubicWeb views. In this part, we will see how to customize our web application using different methods : with pyramid views using jinja2 templates and with React.
Pyramid and Jinja2#
React in a CubicWeb view#
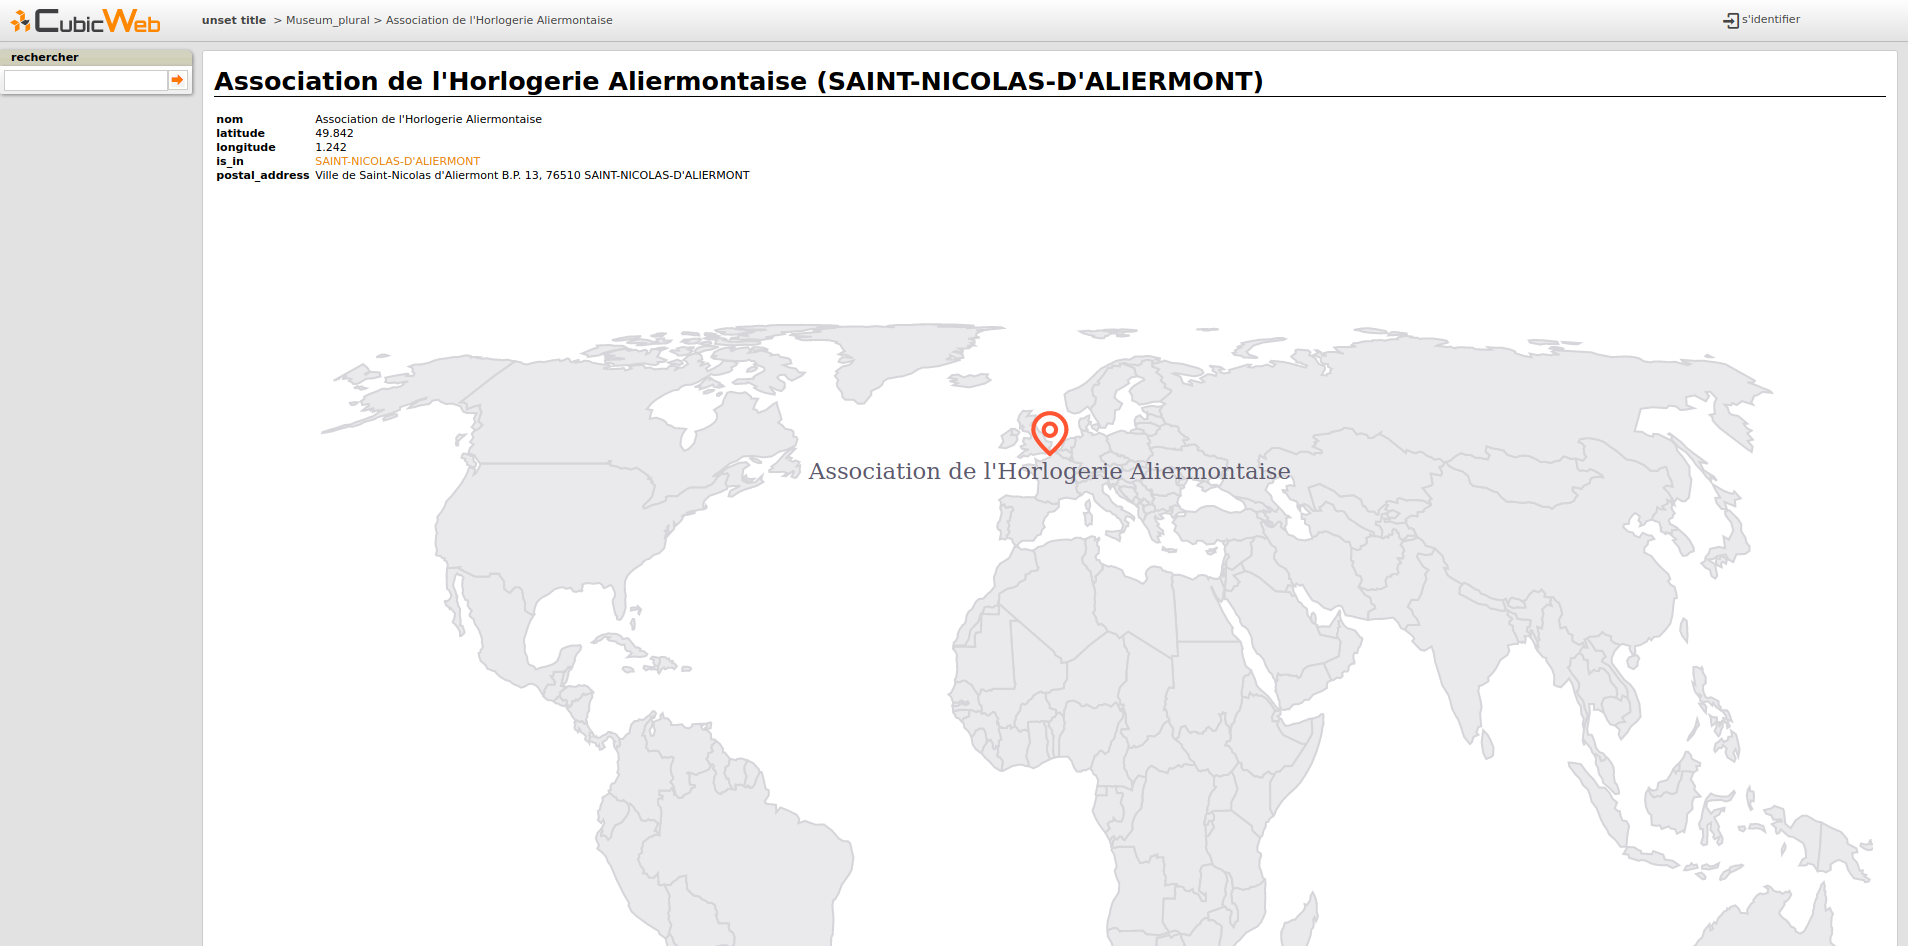
In this section, we want to add a map in museum pages to display where is the museum associated with the page.
To do this, we will use React simple maps, a React library. Our goal is to add a react component inside our museum primary view.
First, we will setup our environment. At logilab, we use Typescript when it is possible, so we will use it also in this tutorial. As module builder, we will use Webpack.
Thus, we need to create three files at the root of our cube: package.json, tsconfig.json and webpack.config.js. A lot of documentation can be find on the Web about how to configure a React/Typescript environment, so we are not going to dwell on it in this tutorial; and we will simply copy and paste the following files.
package.json:
{
  "name": "cubicweb_tuto",
  "version": "1.0.0",
  "description": "Summary ------- A cube for new CW tutorial",
  "directories": {
    "test": "test"
  },
  "scripts": {
    "test": "echo \"Error: no test specified\" && exit 1",
    "build": "webpack",
    "watch": "webpack --watch --mode=development"
  },
  "author": "Logilab",
  "license": "GPL-2.0-or-later",
  "dependencies": {
    "@types/react": "^17.0.0",
    "@types/react-dom": "^17.0.0",
    "@types/react-simple-maps": "^1.0.3",
    "prop-types": "^15.7.2",
    "react": "^17.0.1",
    "react-dom": "^17.0.1",
    "react-simple-maps": "^2.3.0",
    "ts-loader": "^8.0.14",
    "typescript": "^4.1.3",
    "webpack": "^5.18.0",
    "webpack-cli": "^4.4.0"
  }
}
tsconfig.json:
{
  "compilerOptions": {
    "target": "es5",
    "module": "commonjs",
    "jsx": "react",
    "strict": true,
    "esModuleInterop": true
  }
}
webpack.config.js:
const path = require("path");

module.exports = {
  entry: {
    "map.js": "./appjs/geomap.tsx",
  },
  output: {
    filename: "[name]",
    path: path.resolve(__dirname, "./cubicweb_tuto/data/")
  },
  resolve: {
    extensions: [".tsx", ".ts", ".jsx", ".js"]
  },
  module: {
    rules: [
      {
        test: [/\.tsx?$/],
        exclude: /node_modules/,
        use: ["ts-loader"]
      }
    ]
  },
  plugins: []
};
Now we have our configuration files, we have to install NodeJS and then install our project using npm.
sudo apt-get install nodejs
npm install
They are two last things to do:
create a component to display a museum on the map;
integrate our component in a CubicWeb view.
By convention, we put our js files in a appjs directory, and bundle are built in cubicweb_tuto/data (as you can see in our webpack.config.js). Then, we will create a file geomap.tsx in appjs/.
For our component, we will need three parameters: our museum name, its latitude and its longitude. These parameters will be defined in our CubicWeb view when we will call our script. Our file geomap.tsx can be written like this:
import React from 'react';
import ReactDOM from 'react-dom';
import {
  ComposableMap,
  Geographies,
  Geography,
  Marker,
  Point
} from "react-simple-maps";

const geoUrl = "https://raw.githubusercontent.com/zcreativelabs/react-simple-maps/master/topojson-maps/world-110m.json";

declare const data: {
    name: string,
    latitude: number,
    longitude: number,
}

const MapChart = () => {
  return (
    <ComposableMap>
      <Geographies geography={geoUrl}>
        {({ geographies }) =>
          geographies
            .map(geo => (
              <Geography
                key={geo.rsmKey}
                geography={geo}
                fill="#EAEAEC"
                stroke="#D6D6DA"
              />
            ))
        }
      </Geographies>
        <Marker coordinates={[data.longitude, data.latitude] as Point}>
          <g
            fill="none"
            stroke="#FF5533"
            strokeWidth="2"
            strokeLinecap="round"
            strokeLinejoin="round"
            transform="translate(-12, -24)"
          >
            <circle cx="12" cy="10" r="3" />
            <path d="M12 21.7C17.3 17 20 13 20 10a8 8 0 1 0-16 0c0 3 2.7 6.9 8 11.7z" />
          </g>
          <text
            textAnchor="middle"
            y={10}
            style={{ fontFamily: "system-ui", fill: "#5D5A6D" }}
          >
            {data.name}
          </text>
        </Marker>
    </ComposableMap>
  );
};

function App() {
    return <MapChart/>
}

const root = document.getElementById("awesome-map");
ReactDOM.render(<App/>, root);
Now we will override the render_entity(self, entity) function of the Museum PrimaryView, in
cubicweb-tuto/views.py to add:
the bundle javascript including our component;
a div with the id awesome-map which will be used by our component.
class MuseumPrimaryView(PrimaryView):
__select__ = is_instance("Museum")

def render_entity(self, entity):
    self.render_entity_toolbox(entity)
    self.render_entity_title(entity)
    # entity's attributes and relations, excluding meta data
    # if the entity isn't meta itself
    if self.is_primary():
        boxes = self._prepare_side_boxes(entity)
    else:
        boxes = None
    if boxes or hasattr(self, "render_side_related"):
        self.w('<table width="100%"><tr><td style="width: 75%">')

    self.w('<div class="mainInfo">')
    self.content_navigation_components("navcontenttop")
    self.render_entity_attributes(entity)
    if self.main_related_section:
        self.render_entity_relations(entity)
    self.render_map(entity)
    self.content_navigation_components("navcontentbottom")
    self.w("</div>")
    # side boxes
    if boxes or hasattr(self, "render_side_related"):
        self.w("</td><td>")
        self.w('<div class="primaryRight">')
        self.render_side_boxes(boxes)
        self.w("</div>")
        self.w("</td></tr></table>")

def render_entity_title(self, entity):
    """Renders the entity title, by default using entity's
    :meth:`dc_title()` method.
    """
    self.w(f"<h1>{entity.title_with_city}</h1>")

def render_map(self, entity):
    """Renders a map displaying where the museum is."""
    if not (entity.latitude and entity.longitude):
        return
    js_file = f"{self._cw.vreg.config.datadir_url}map.js"
    data = json_dumps(entity)
    self.w('<div id="awesome-map"></div>')
    self.w(
        f"""
        <script type="text/javascript">
            const data = {data};
        </script>
        <script src={js_file}></script>
    """
    )
Most part of render_entity(self, entity) are the same as its definition in PrimaryView, except that we add a call to render_map(self, entity); which will add a div tag with a specific id and a script tag adding our javascript bundle, and define variables containing information to display a museum on the map. The specific id must be the same as the one we defined in our javascript file, awesome-map.
Now, it’s time to build the javascript bundle using:
npm run build
And then, run our application:
cubicweb-ctl pyramid -D tuto_instance
We now have a world map displaying the location of our museum on museum pages. A lot of things could be done to have a better result, like center the map on the museum, but it’s out of the scope of this tutorial.